When you are done sewing any type of garment, be it a dress, a skirt, or a T-shirt, you should hem it. Without a hem to finish it, the piece of clothing you sew will just not look as it should.
Why is a hem essential? Well, hems are vital because they give clothes a neat finish and keep them from unraveling. Besides, hems make garments last longer, and it gives them a store-bought appearance. All in all, without a hem finish, even clothes made by top professionals may look amateurish.
Any type of clothing can be hemmed, as long as it has loose edges. However, our focus in this post will be on T-shirts.
T-shirts can be hemmed in various ways, including with a serger, with hemming glue, with a sewing machine, or by hand. But in this article, we will only focus on three of these methods.
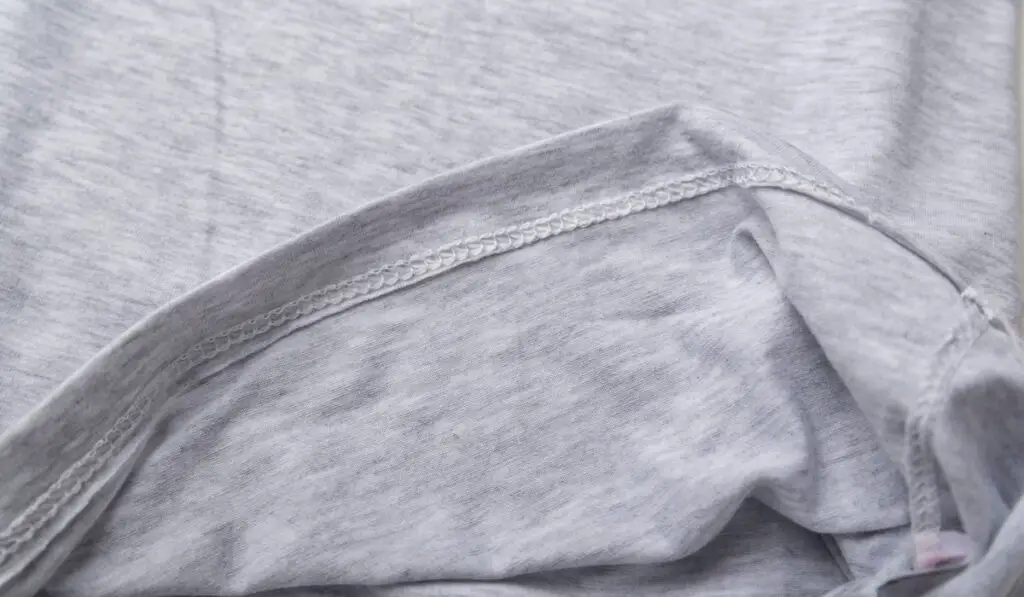
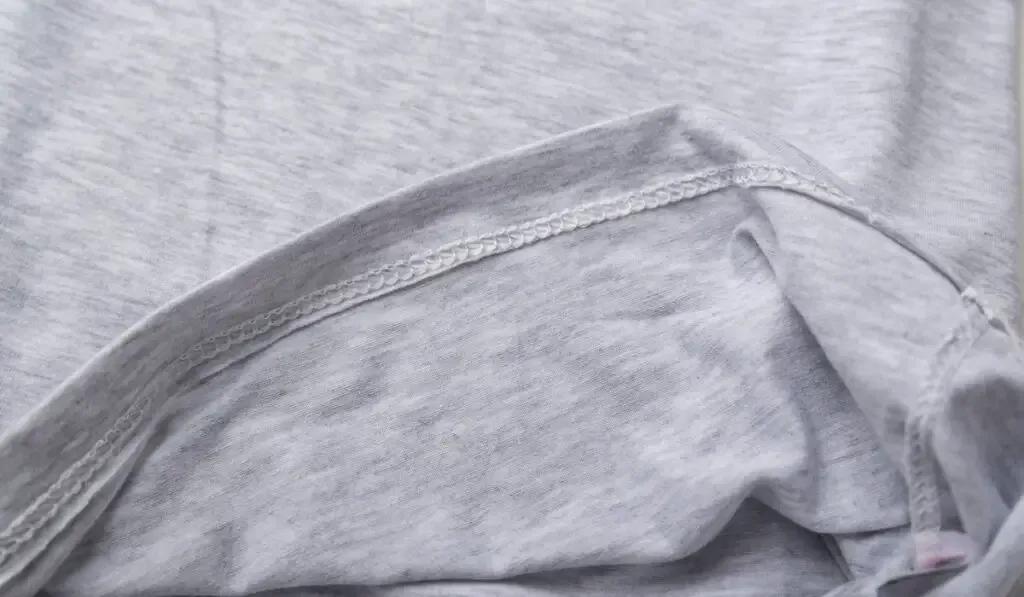
Hemming a T-shirt With a Serger
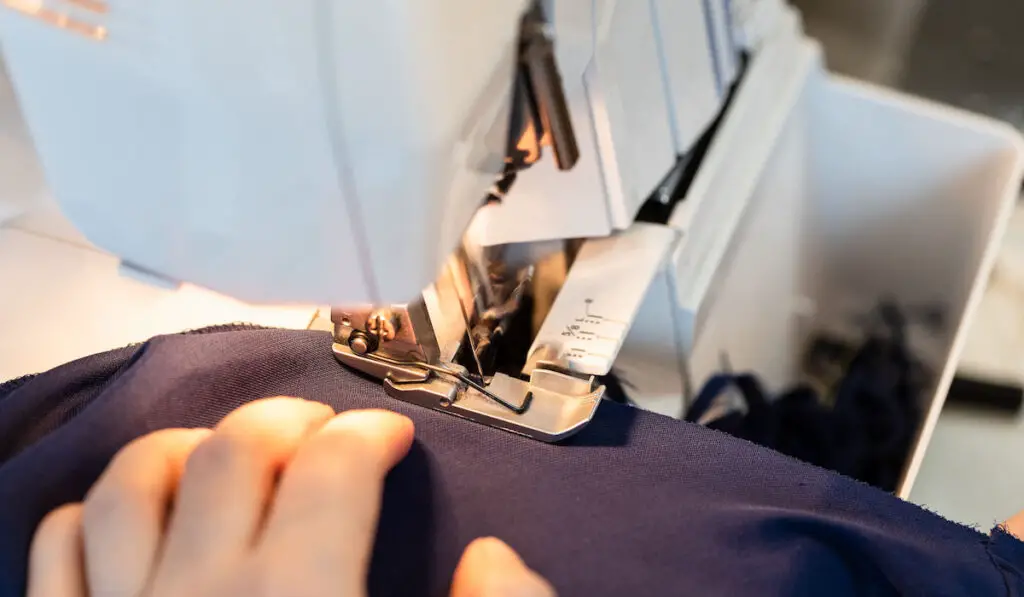

Creating hems on a T-shirt with a serger can be a bit challenging. But it is not impossible. The following guide should help when hemming a T-shirt with a serger:
- Start by setting your serger to the type of stitch you want. For basic hemming, opt for an overlock stitch. But for light fabrics, you may opt for rolled stitch.
- Trim the T-shirt to the length you desire while leaving an allowance of around ¼ inch. Then fold the edges inwards. Once folded, secure the fold in place with a fabric stabilizer or pins.
- Before you place the T-shirt in the serger, sew a short length of stitches without fabric. This will produce a chain of stitches to set the hemming process in motion.
- Next, place the folded edge of the T-shirt in the serger right-side-up. Ensure the left needle aligns with the edge of the hem on the reverse side of the fabric. You should be able to ascertain this using the indentation as a guide.
- Serge the whole length of the edge of the T-shirt. Then remove it and serge for about 2 inches without fabric to create another chain of stitches.
- Once you are done, you have to tuck the two stitch chains. You can do this by weaving them under the hem stitches using a darning needle. After that, you may add some seam sealant to the woven stitch chains. This will make them extra secure and keep them from unraveling.
Hemming a T-shirt With a Sewing Machine


To hem a T-shirt with a sewing machine, follow the steps below:
- You may start by ironing the ends with the raw edges of the T-shirt. This smooths the fabric out and makes folding more accurate.
- After that, turn the T-shirt inside out and fold the raw edges. A fold of about ¼ inch should do.
- Once folded, fasten the fold with pins. Then iron it to keep it in place. Besides keeping the fold in place, ironing helps ensure you get a clean, well-aligned hem.
- After ironing, remove the pins and fold the folded edge by ¼ inch once more. This new fold should hide the raw edges. With the raw edges hidden, the T-shirt will not unravel while you wash or do any other thing.
- Fasten the new fold with pins and iron it to keep it in place.
- Once this is done, proceed to your sewing machine and get it ready. Oil the parts, clean it out, then set it up with a thread whose color matches that of the T-shirt.
- You should start sewing at the side seams of the T-shirt. This way, the beginning and the end of the seam will not be stretched readily. Thus, the seams will last longer.
- Next, at a point a little over ¾-inch from the bottom of the T-shirt, sew a ½-inch straight stitch. Then sew backward on the same stitch to form a knot.
- Once you have knotted the seam, continuing sewing forward. Do this while maintaining the over-¾ inch from the bottom of the T-shirt. Remove the pins as you proceed with sewing – do not sew on them.
- Keep the seam going until you sew the hem and return to the starting point.
- Once you get to the start of the seam, create a finishing knot. Do this by sewing backward for about ½ inches.
- At this point, you are done with hemming. So, cut all the loose threads.
- You may turn the T-shirt to the right side and iron it one more time to give the hem a cleaner appearance.
Hemming a T-shirt by Hand
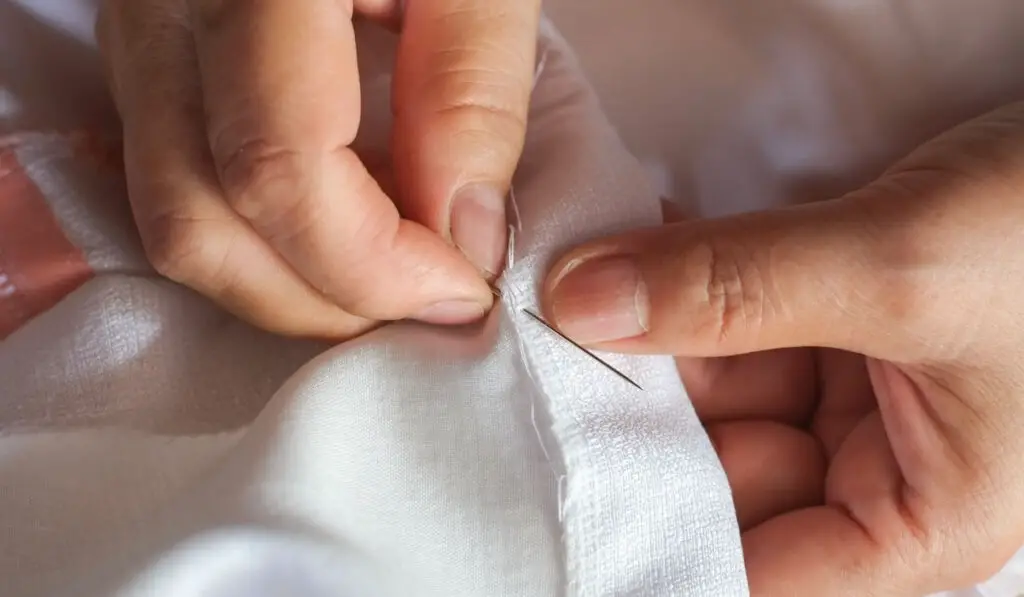

We all have times when our sewing machine is inaccessible and we need to fix a garment. Perhaps you are away from home, or your sewing machine is in need of repair. At such a point, knowing how to hem a T-shirt with your hands, thread, and a needle will come in very handy.
Here’s how to hem a T-shirt by hand:
- Iron the T-shirt to remove wrinkles. This ensures the accuracy of the folds for the hem.
- Wear the T-shirt while standing before a mirror. Then mark the spot where you would like to have the new hem.
- Next, decide on the depth of the hem you want on the T-shirt. If the fabric below the spot you marked is more than the hem depth, trim off the excess. For a T-shirt, a hem depth of ¾ inch should be enough.
- Turn the T-shirt inside out, then along the hemline, fold its edge outwards once.
- Once this is done, you have to choose the type of stitch you intend to use. There are different hand stitches you can use in hemming. Each one has its distinct pros and cons.
- If you are looking to save time, you may opt to use the whipstitch. While this stitch is fast, it is exposed and can readily unravel. When using whipstitch, keep the small stitches on the right side with the slant stitches on the reverse side.
- If you would not be using the whipstitch, you can try out the slip stitch. The benefit of making your hem with a slip stitch is that the seams are small and neat on both sides. So, the hem comes out clean.
- You may also opt for a catch stitch instead of the other two we have mentioned. This type of stitch offers durability and elasticity. On the right side, you would have tiny, barely noticeable stitches. Then on the reverse side, you would have slight criss-cross stitches.
- Another alternative to the three types of stitches mentioned above is the fell stitch. This type of stitch is pretty strong. So, if you want an extra durable hem, this is your best bet. The downside of using the fell stitch is that the seams on the right side can be pretty noticeable. Nonetheless, if you are working with a T-shirt made of thick fabric, you might be able to hide the seams. To do this, do not push the needle all the way out when passing it to the right side. This way, the stitch remains in between the fabric instead of the surface of the right side.
- After deciding on the type of stitch to use, you may get on with sewing. Start by preparing your needle with a thread that matches the T-shirt.
- When threading your needle, ensure you have excess thread. Having too little would be uncomfortable since you would have to rethread multiple times.
- After successfully threading the needle, tie the end of the thread to create a knot.
- Once this is done, you may start sewing. While sewing the hem, ensure the stitches are uniformly spaced for a clean outcome.
- Stitch the folded edge of the T-shirt along the hemline. Keep going until you get to the seam you started with. At this point, tie the thread to create a finishing knot.
Resources
- https://www.allfreesewing.com/Basics-and-Tutorials/Types-of-Hems
- https://sewbakedecorate.com/2016/03/18/its-sew-easy-how-to-hem-a-shirt-or-anything-sewing-tutorial/
- https://www.ehow.com/how_12062659_hem-tshirt-sewing-machine.html
- https://www.wikihow.com/Hand-Sew-a-Hem
- https://thesewingloftblog.com/serged-hem-tricks/
- https://youtu.be/CD9HrKpr7cg