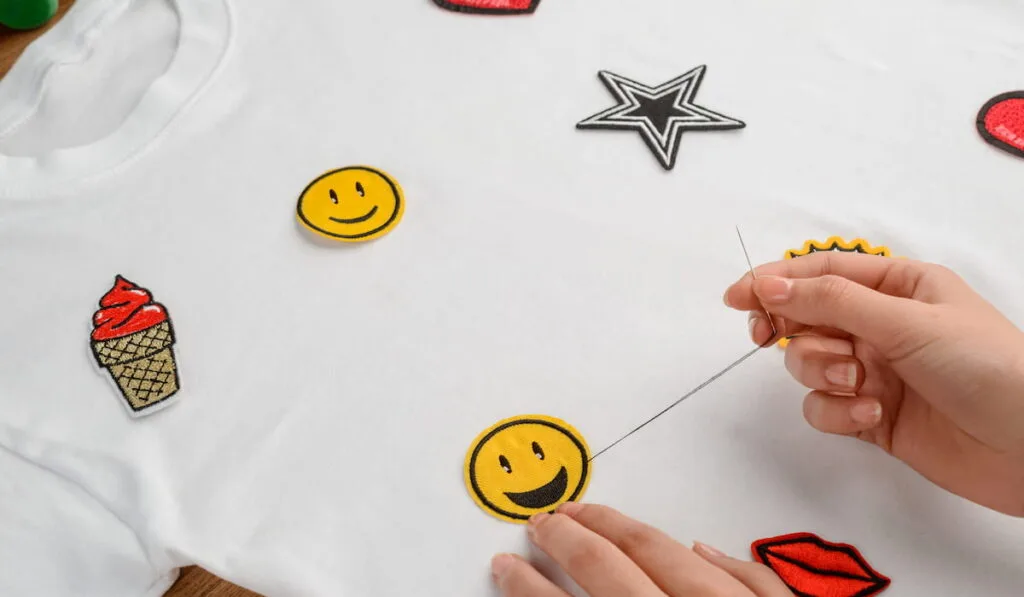
For people who aren’t used to sewing, the idea of sewing a patch is enough to make you nervous. The thought of using a sewing machine can be even more anxiety-inducing, and you may not want to spend the money if you don’t have one currently.
Patching things like jeans, a blanket, a jacket, or something like a car seat can be tricky, and sometimes patches don’t always lend themselves to sewing. If you want to patch something that’s attached to a large item, like a sofa for example, then a sewing machine isn’t even an option.

Thankfully, sewing things poorly by hand or with a machine isn’t your only option. There are ways to attach patches without sewing. Some of them include using fabric glue, using a patch kit, etc.
If you’ve never used a patch, we’re here to help. We’ve outlined three different ways you can put a patch on and keep it there long-term.
Knowing how to patch things will keep your gear in better condition longer and will help you get your money’s worth when you buy something. If you’re using patches to add to a jacket’s design or customize other fabric, it’s a useful skill to have.
Let’s take a look at where you can start when it comes to putting on patches.
Ironing On a Patch
Ironing patches has been a go-to patching method for decades. Girl Scouts and varsity sports players have been ironing on patches forever, it seems. The reason they’ve been doing it that way is that it works and is fairly simple.
Here’s what you’ll need:
- A thin piece of cloth
- Ironing board
- Iron
- Patch
Before you start ironing, you should know that patches iron onto cotton and other fabrics well, while nylon, leather, and other materials won’t work so well. Make sure the fabric you’re using will work with ironing.
Here are some steps you should follow:
- Get the Iron Hot – You’re going to want your iron piping hot before you press the patch on. Put it on the highest possible setting and let it sit there for a while.
- Place Your Patch – Set it to get it ready for the iron. There should be an adhesive on one side and the patch design on the other. If it’s hard to tell, look for the duller side – that’s probably where the adhesive is. If you’re putting a patch on something that won’t lie flat, stuff it with something like a pillow to keep it standing so you can press the patch against it.
- Use the Thin Cloth Between the Iron & the Patch – The thin piece of cloth is there to prevent your patch surface from any burns from the iron.
- Iron the Patch – Place the iron on the piece of cloth and press it down on the patch. Leave it against the patch for around 30 seconds, enough time for the adhesive to melt into the fabric. Repeat if necessary.

Placing Patches with Fabric Glue
Fabric glue is another option for people who don’t want to sew. One thing you should know about fabric glue, though, is that it can be more sensitive to frequent washing than ironing or sewing. The washing machine and dryer can erode the glue over time.
That said, it’s perfect for something like badges on a sash or a piece of furniture or something like that.
You can find good-quality fabric glue at your local hobby store, online, or hardware stores. If possible, find a fabric glue that says it is washable. Fabric glue is also a great choice for things like martial arts uniforms with thicker material that can be a pain to sew.
There isn’t much to say when it comes to how to install a patch with fabric glue. Pretty much all you need to do is spread the glue on the patch and press it against wherever it is you want it to be. Let it dry for a while before you use it.
Fabric glue typically bonds quickly and strongly, so it’s a more reliable option than ironing in many cases. The glues also stick fairly well to most types of fabric. If you see edges coming up or it falls off, all that means is that you didn’t use enough glue.
Give it another shot with a heavier dose of glue to get it to stick and stay.
Using Heat N Bond for Patches
Heat n Bond is a great option for custom patches that don’t come with adhesive on them. People use Heat n Bond all the time to put unique patches on shirts, jackets, pillowcases, backpacks, and anything else they can think of.
Essentially, with Heat n Bond, you take the size of the patch you’re attaching and cut a corresponding strip of Heat n Bond only a tad bit smaller.
- Sizing the Heat n Bond – First, you take one of the thin plastic coverings off of one side of the Heat N Bond. Stick it to the patch. With a pair of scissors, cut off any edges or corners to right-size your adhesive. You don’t want it bigger than the patch because it will show once you use the iron on it.
- Sticking It to the Fabric – Then, remove the other plastic covering on the other side of the Heat n Bond, and stick it to the fabric where you want to put the patch on. Once it’s in place, you need either a thin piece of fabric or a piece of paper on top of the patch before you iron it. This will stop the iron from burning the patch.
- Ironing the Heat n Bond – Apply a very hot iron to the Heat n Bond and patch for around 20 seconds to get the adhesive to melt and stick to both the patch and the fabric. Let it cool and it’s ready for use!
Try What Works Best
As you play with different fabrics and patches, you’ll discover that some patches work well with certain materials and attaching methods. Play around a bit with different methods and find out what you like best and give you the best results.
At the end of the day, the method that gets the patch on and keeps it there with the least trouble is the way to go.
Not everyone wants to sit up at night after the kids are in bed sewing patches on school jackets or merit badge sashes.
Give yourself a break and try out some of these other ways to see if it will save you time and help you avoid buying a sewing machine you don’t know how to use!