You can add elegance and value to your upholstery projects with diamond quilting. But beyond that, diamond quilting can be valuable to you in many other fabric projects.
Overall, diamond quilting is simple once you get the hang of it. However, if you are making diamond quilting patterns for the first time, you might need a little help.
Below, we discuss various ways to do diamond quilting. So, if you’ve been looking for an article on how to do diamond quilting, here you go.

How to Do Diamond Quilting for Applique and Patchwork Quilts
The method we describe here is ideal when you want to do diamond quilting for applique and patchwork quilts.
Materials You’ll Need:
- Quilt top fabric
- Clear acrylic ruler with 30-degree, 45-degree, and 60-degree diagonal lines
- Rotary cutter
- Cutting mat
- Chalk pen
- Batting
- Backing fabric
- Thread
- Spray glue
- Quilting machine
Steps (Single Diamond Pieces)
If you want to make single diamond pieces for your applique or patchwork, follow these steps:
Step 1
Cut your fabric into strips that are 3 inches wide. You can make the strips wider or thinner if you want.
Step 2
Lay your fabric on the cutting mat in landscape orientation. Then place the ruler on it, aligning the 60-degree line with its bottom edge.
Trim off the selvage at both sides of the fabric, as described in Figure V below.
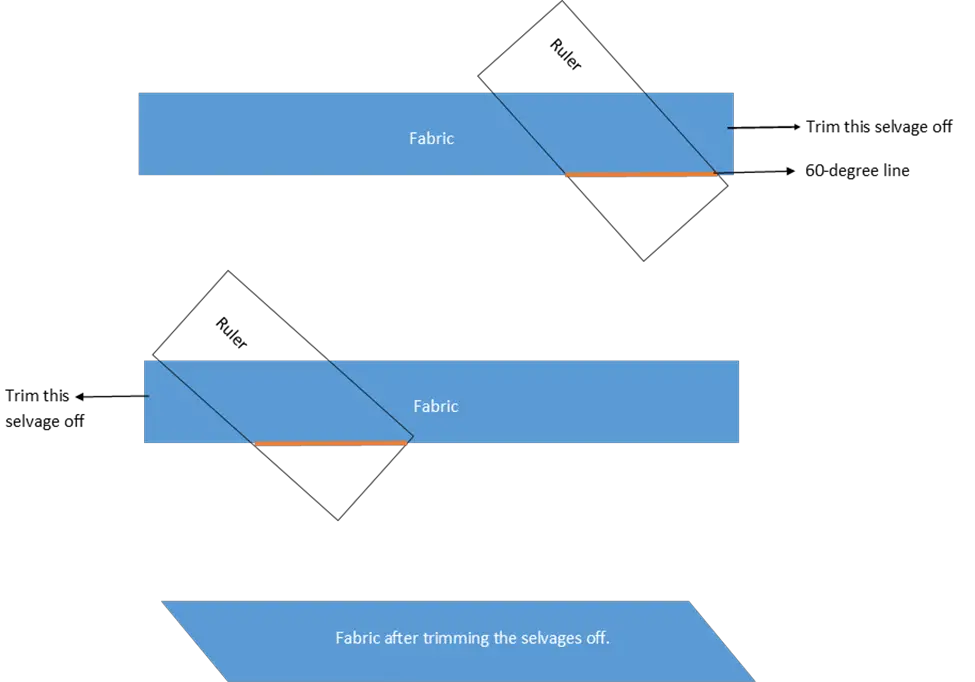

Figure V
Step 3
Line up your ruler 3 inches from the trimmed edge of the fabric as shown below.
Then, with your rotary cutter, cut the fabric along the ruler’s inner side to get your first diamond piece.
Note that you place your ruler 3 inches from the trimmed edge of the fabric because the fabric is 3 inches wide. If it were 2 inches wide, you would have to place your ruler 2 inches from the trimmed edge.
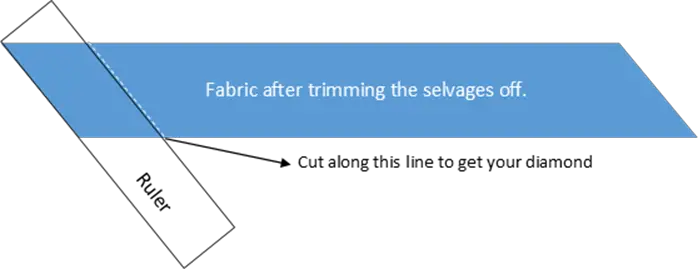
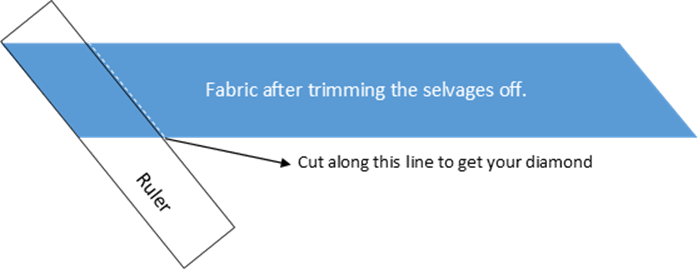
Figure VI
Step 4
Repeat step 3 along the fabric’s length until your get all the diamond pieces you can.
Step 5
Sew the diamond pieces together in your desired pattern once you have all that you need. Then quilt them to your batting and backing.
Steps for Double Diamond Pieces
If you want to make double diamond pieces at a time, follow these steps:
Step 1
Cut your fabrics into 2 strips that are 3 inches wide (you can make the strips wider or thinner if you want).
Next, sew them together as portrayed below in figure VII.


Figure VII
Step 2
Lay the joined fabric strips on the cutting mat in landscape orientation. Then place the ruler on them, aligning the 60-degree line with the bottom edge.
As portrayed in Figure VIII below, trim off the selvages at both sides of the two fabric strips.


Figure VIII
Step 3
Line up your ruler 3 inches from the trimmed edge of the fabric strips as shown below.
Then, with your rotary cutter, cut the fabric strips along the ruler’s edge to get your first diamond piece.
Note that you place your ruler 3 inches from the trimmed edge of the fabric because the fabric strips are 3 inches wide.
If the fabric strips were 2 inches wide, you would have to place your ruler 2 inches from the trimmed edge.


Figure IX
Step 4
Repeat step 3 along the strips’ length until your get all the double diamond pieces you can.
Step 5
Sew the double diamond pieces in your desired pattern once you have all you need. Then quilt them to your batting and backing.
How to Do Diamond Quilting With a Diamond Quilt Template
For speed, ease, and accuracy, you can get a diamond quilt template to do diamond quilting.
Materials You’ll Need:
- Quilt top fabric
- Diamond quilt template
- Rotary cutter
- Cutting mat
- Chalk pen
- Batting
- Backing fabric
- Thread
- Spray glue
- Quilting machine
Steps
Step 1
Cut your fabric into strips that are 3 inches wide. You can make the strips wider or thinner, depending on what you want.
Step 2
Lay your fabric on the cutting mat in landscape orientation. Then place the diamond quilt template on it, aligning the edge of the template with the bottom edge of the fabric.
Trim off the selvage at that edge of the fabric, as described in Figure X below.


Figure X
Step 3
Next, line up your diamond template at the trimmed edge of the fabric so that the 3-inch marking of the template is in line with the fabric.
Then, with your rotary cutter, cut along the edge of the template.
See figure XI below.


Figure XI
We used the 3-inch marking of the diamond quilt template because the fabric strip is 3 inches wide. If your fabric were 2.5 inches wide, the 2.5-inch template marking would be ideal.
Step 4
Repeat step 3 along the fabric’s length until you get all the diamond pieces you can.
Step 5
Sew the diamond pieces in your desired pattern. Then quilt them to your batting and backing.
Benefits of Using a Diamond Quilt Template
Accuracy
Since diamond quilt templates are already in the shape of a diamond, you do not have to measure anything to create the diamond patterns. Hence, the accuracy.
Besides, diamond quilt templates come with markings for diamonds of various sizes.
Speed
Since you will not be measuring anything, you can focus only on drawing the diamond pattern on your fabric. This will save you some time and help you work faster.
Seam Allowance
Diamond quilt templates typically come with a built-in seam allowance. So you can mark the seam allowance on the fabric readily.

How to Do Diamond Quilting (Diamond Pleating) With a Single Quilt Top Fabric
When doing diamond quilting on upholstery projects like cushions, quilters typically use just one type of fabric for the quilt top.
Below, we describe how you can do the same.
Materials You’ll Need:
- Quilt top fabric
- Clear acrylic ruler with 30-degree, 45-degree, and 60-degree diagonal lines
- Chalk pen
- Sew foam (batting)
- Backing fabric
- Thread
- Spray glue
- Quilting machine
Things to Note
- Some sew foams come with fabric backing. So you can get a sew foam with backing instead of getting each item separately.
- The combined thickness of the quilt top, sew foam, and backing should not be too much for the presser foot height and throat plate.
- If you want the diamond outline to be visible, use a thread color that complements the quilt top fabric color.
The Steps
Step 1
Cut your quilt top into the desired shape and size (the shape and size of what you are trying to create).
Cut your sew foam and backing in the same shape and size as the quilt top.
Step 2
Apply spray glue on the top of the sew foam. Then apply spray glue on the bottom of the quilt top fabric.
If the backing fabric does not come attached to the sew foam, spray some glue on it.
Wear a respirator or a mask while spraying the glue on the materials for your safety.
If your sew foam has a backing fabric attached, do not apply the spray glue on the backing fabric. Apply the glue on the foam side of the sew foam (the side that will touch the bottom of the quilt top).
Step 3
Place the bottom of the quilt top on the gluey surface of the sew foam. Then gently press them together, moving from the center to the edges.
After gluing the quilt top to the sew foam, flip them over to expose the unattached side of the sew foam.
Next, place the gluey surface of the backing fabric on the unattached side of the sew foam. Then gently press them together, moving from the center to the edges.
You will remove bulges and wrinkles more effectively if you move from the center to the edge.
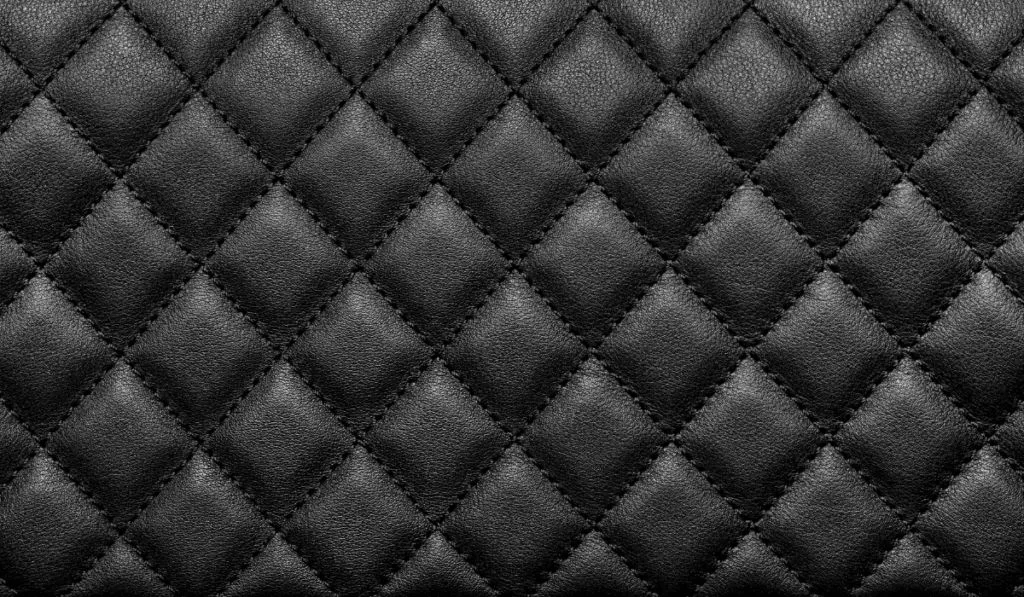
Step 4
Place the clear acrylic ruler on one edge of your quilt top. Align either the 30-, 45-, or 60-degree lines with the edge.
In our example, we will use the 45-degree line.
Then following the ruler’s outline, draw a straight line (Line I) from that edge to the edge beside it. (See Figure I below).
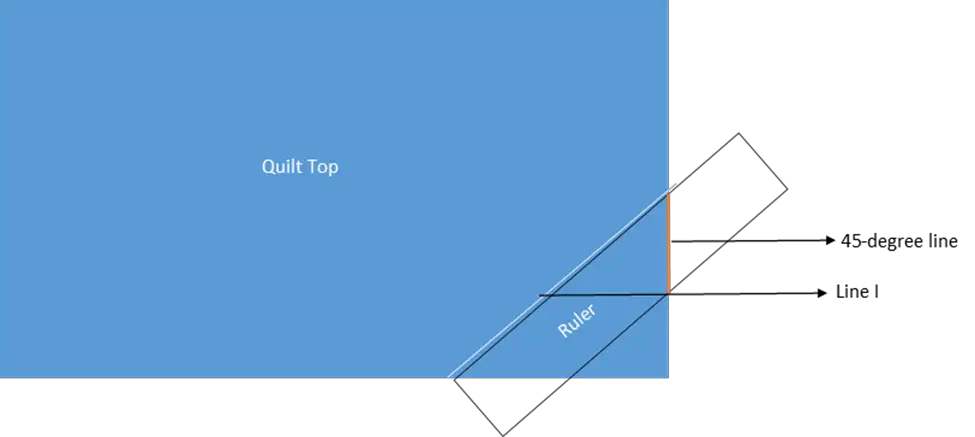

Figure I.
Next, turn the ruler as portrayed in Figure II below. Then draw another straight line (Line II) to cut across the first line.
Figure II.
Step 5
Beside Line I and Line II, draw a parallel line as shown in Figure III. The distance between the parallel lines and Line I and Line II should be equal.
At this point, you should see your first diamond pattern at the center of all 4 lines.
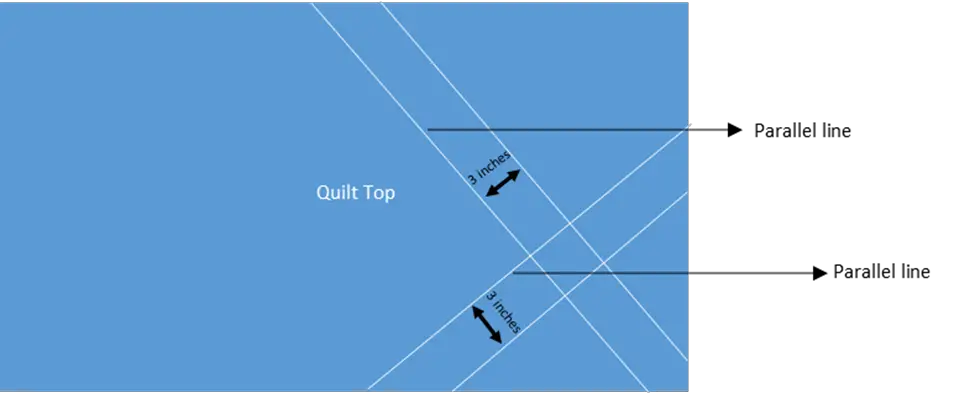
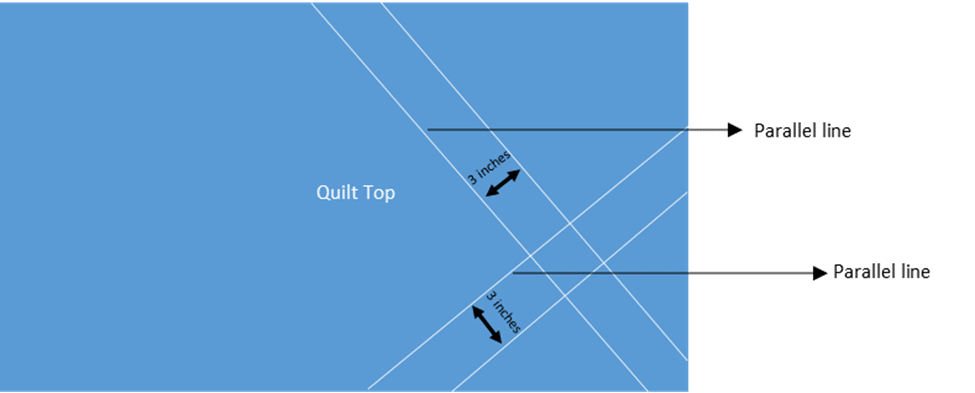
Figure III.
Step 6
Keep drawing equidistant parallel lines using Line I and Line II as references. Your quilt fabric should have a pattern like Figure IV when done.
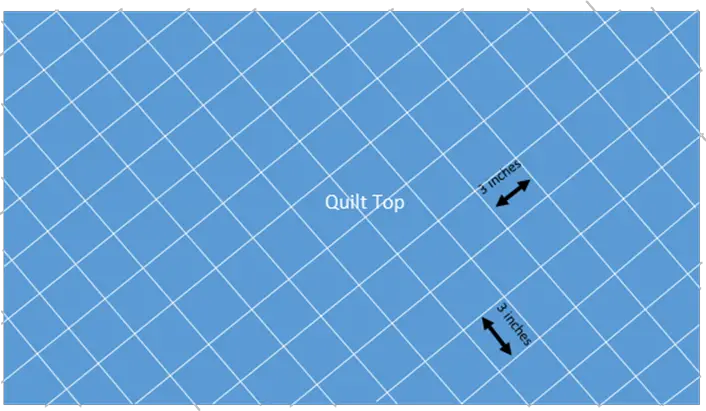
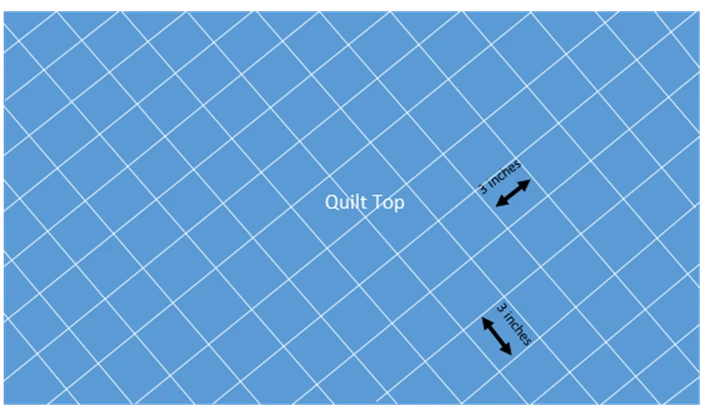
Figure IV.
Step 7
Once you have a pattern like Figure IV, you are ready to do your diamond pleating.
But before you get to sewing, test the tension of the quilting machine on a scrap piece of fabric. The point of this test is to find the best tension and stitches for your quilt fabric.
Once you get your desired tension and stitches, move to step 8.
Step 8
Feed your patterned quilt fabric into your quilting machine and sew along the lines.