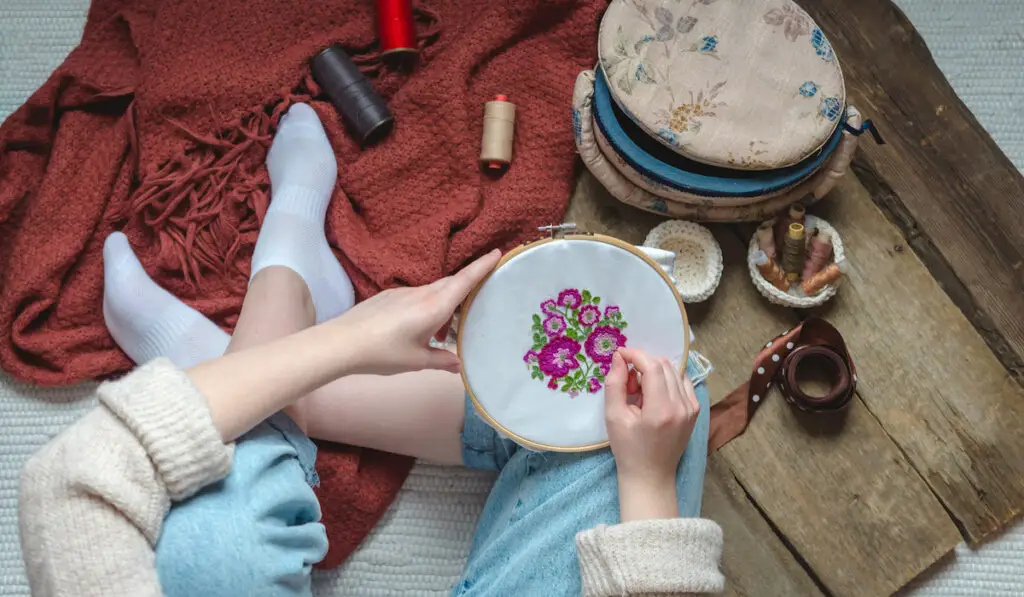
Embroidery is one of the most decorative art pieces and uses cloth, needles, and thread to create intricate, textured crafts.
It’s an art that holds within it a world of creativity, beauty, and self-expression.
Displaying embroidery goes beyond just hanging the hoop; of course, you can hang your embroidery on the wall as it has always been, but there are many more creative ways to spice up the display of your lovely work.
The number of ways in which you can display your embroidery is as diverse as the stitches that bring the designs to life.
In this article, we will look into some of these ways, how you can get on with them, and provide tips on how to make your embroidery stand out.
Keep reading to find out!

Unique Ways to Display Embroidery
Although it has always been that putting embroidery into a frame is the typical way of displaying embroidery, it is not the best.
Over time, the beauty of the work starts to fade, and embroiderers who like their creative stitchings to be unique find it boring to display their work that way over and over again.
So how do you spice things up? You can do that by applying the following descriptions:
1. Picture Frame
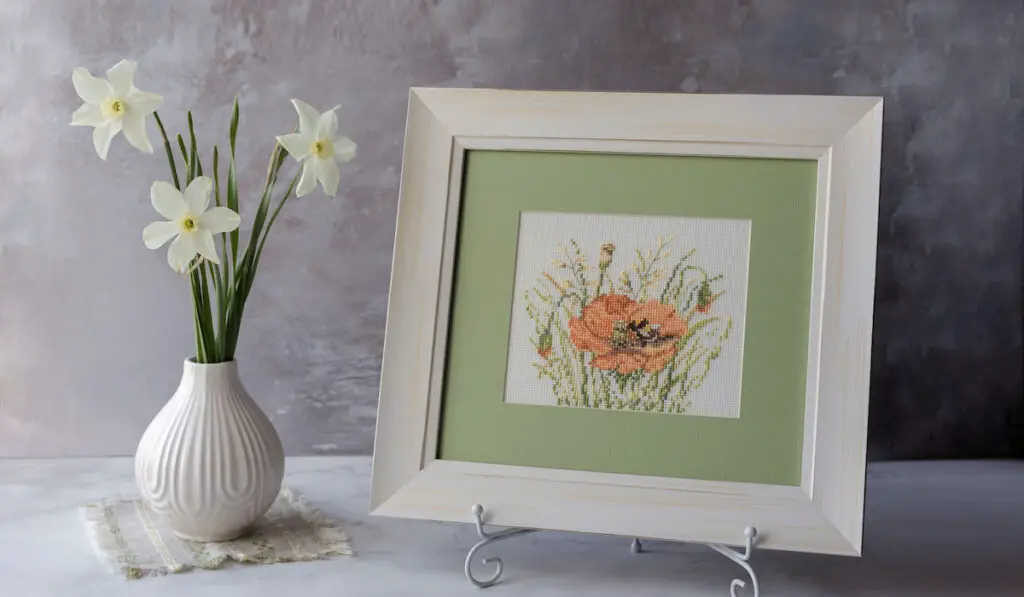

A picture frame is a unique method for displaying needlework and is also an excellent way to display your favorite embroidered works in your home or workplace.
The embroidery may be shown in either a standard picture frame or a vintage/antique picture frame, with or without glass or a mat.
There are several expensive and elegant photo frames that may leave a lasting impact.
However, a vintage or antique picture frame with all the decorative jazz surrounding it might enhance your artwork’s overall beauty.
Here’s how to display your needlework in a picture frame:
- Ensure that there are no wrinkles or creases. Use an iron (at the lowest heat setting) to smooth out any creases.
- Take out the frame’s back and place your piece in the center of the given board. Fold the excess fabric neatly and secure it in the middle – at the back of the board.
- Secure the excess fabric by sewing a zigzag line through the extra fabric. Keep the tension tight and also tighten the embroidery around the board.
- Remove any smudges from the glass pane.
- Insert your piece inside the frame and close the clasps.
2. Craft Hanger

A craft hanger is a tool or accessory used to hang and showcase various crafts, such as embroidery hoops, macrame wall hangings, or handcrafted decorations.
It is a practical way to display and showcase crafts while also providing a beautiful touch to the display.
Here’s how to use a craft hanger:
- Choose a hanger that’s appropriate for the size and weight of your embroidery. Ensure that it provides adequate support for your work.
- Smooth out any wrinkles or creases from the needlework.
- Place the embroidery on a flat surface and center it within the hanger. Keep it straight, taut, and level.
- Fasten your embroidery to the hanger using clips, hooks, or sticky strips. Ensure it’s nice and taut.
3. Ornaments


Embroidering ornaments is a great way to display your pieces. Not only are they great for decorations, but they can also make great personalized gifts for your friends and family.
Here’s an easy-to-follow guide for using ornaments:
- Ensure that your embroidery has no creases or wrinkles.
- Choose embellishments or decorations that match the style of your work. They can be ribbons, charms, beads, etc.
- Secure your embroidery to a hoop or frame.
- Add the decorations/embellishments to your work. Experiment with different placements and combinations.
- Stitch a ribbon or thread around the hoop or frame if it has no hanger. Alternatively, you can use adhesive hooks.
- For a one-of-a-kind look, you can tie decorative ribbons around the hooks or knobs.
4. Triptych or Grid Display
Embroidery can also work well as a set.
Creating a grid/ triptych is a great way to combine your embroidery pieces and showcase them in a unique and fascinating way.
Here’s how to set up a grid/triptych:
- Gather the multiple embroidery designs you want to display.
- Choose a beautiful frame that compliments and can accommodate all your embroidery designs and arrange them.
- Add some finishing touches and display them.
You can create a symmetric arrangement, a random-collage-like display, or any other pattern that appeals to you.
5. Shadow Box
A shadow box is a framed, enclosed glass display cabinet that is used to highlight rare things. It may display family treasures, artwork, collectibles, and much more!
A shadow box is an excellent way to showcase your crafts in an original and intriguing manner and is ideal for displaying your stitching or other needlework.
The integrated door, which allows you to quickly access goods inside while preventing items from slipping out, is a distinctive characteristic of shadow boxes.
Because the glass pane does not push on your stitching, you do not have to worry about your work fading with time.
Shadow boxes are available in various types, colors, sizes, and patterns, giving you the pleasure of picking the one that complements your home décor!
Here’s how you make use of a shadow box to display your embroidery:
- Prepare the needlework by removing any creases.
- To fit the shadow box, cut the foam core to size.
- Place the embroidery on the foam core and fix it with tape.
- Trim the extra cloth to create a clean border.
- Inside the shadow box, place a foam core with embroidery.
- Close and secure the shadow box.
- Select a good place for your embroidered shadow box.
6. Wrap/Stretch Over Canvas
Another way to display your embroidery is by wrapping it around or stretching it across a canvas. More often than not, it comes out fantastic!
If you can’t find a canvas that’s the right size or shape, you can use stretcher bars.
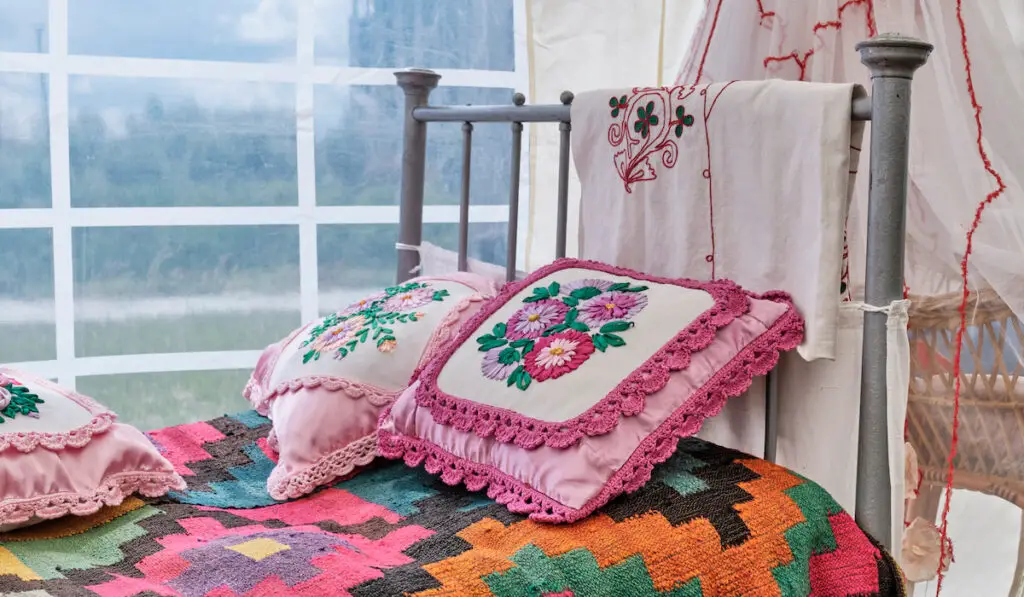
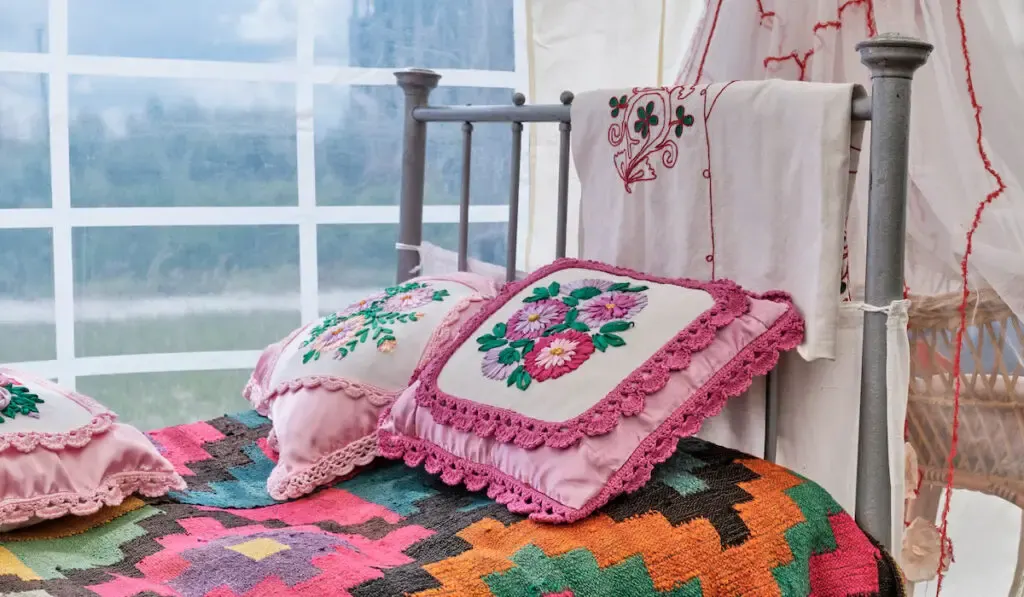
7. Pillowcase
Embroidery on pillowcases provides a lovely touch to any bedroom design. Pillowcases with delicately embroidered motifs become one-of-a-kind statement pieces.
They not only improve the overall look of your living environment, but they also provide a personal touch.
These embroidered pillowcases are ideal for gifting or personal usage and will be treasured memories.
Here’s a step-by-step tutorial for displaying needlework on a pillowcase:
- Select a plain pillowcase to go with your embroidered design. To create a cohesive presentation, consider the color and fabric material.
- Make sure your needlework is clean and free of wrinkles or creases.
- Position the pillowcase on a clean, level surface. Consider the size and direction of your embroidered pattern when deciding where to place it.
- Place a piece of stabilizer or backing cloth beneath the embroidery to add stability. Secure the embroidery and backing fabric to the pillowcase with pins or clips, making sure it is centered and straight.
- Thread a needle with matching thread and sew carefully around the edges of the embroidered pattern. Attach the needlework to the pillowcase with small, tidy stitches. Take precautions not to sew through the back layer of the pillowcase.
- Trim any excess stabilizer or backing fabric off the backside of the pillowcase after the embroidery is secure.
8. Necklace Embroidery Display

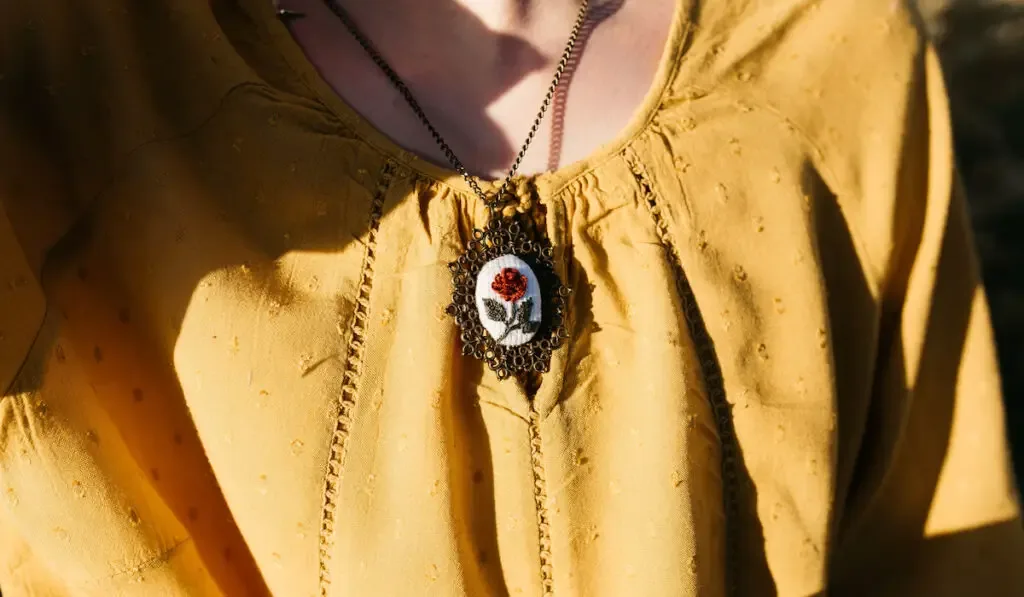
Embroidered necklaces are also an excellent way to transform your artwork into wearable fashion jewelry!
Instead of hanging your stitchings to collect dust, why not incorporate them into your everyday life using necklaces?
The instructions below will show you how to showcase your embroidery on necklaces:
- Prepare your needlework (small enough to fit on a necklace pendant) and necklace (a flat surface necklace pendant base that fits the style and size you want).
- Trim the embroidered fabric to suit the pendant’s base. Make sure it covers the whole surface of the pendant, too, and does not extend beyond its edges.
- Allow the adhesive to dry before attaching the pendant to a necklace chain or cord. Select a length that complements your style and preferred necklace design.


Other Ways to Display Embroidery
Besides the ways described above, there are also other ways to display your embroidery that can add a touch of uniqueness to your home or workspace. These include:
- Using a towel rack or ladder
- Jar lids
- Table runners
- Basket cover
- Window dressing
- Quilt squares
- Mini wooden easel
You can also:
- Prop on a shelf
- Place or prop it up against old books
- Hang it on your front door or bedroom doors
- Use your artwork as a photography prop
Conclusion
Embroidery is a lovely and personal art form that you may use to beautify your house and give as gifts.
Working on an embroidered project takes a lot of time, effort, and patience, so why not exhibit it proudly within your space?
Fabrics require air exchange, so avoid displaying your work in airtight containers. You should also avoid exhibiting needlework in humid areas (such as toilets).
There are numerous unique methods to exhibit needlework, from placing an embroidery piece on a wall to crafting embroidered jewelry.
Each display method allows your embroidery to take center stage and become a beautiful part of your living or workspace, and I hope this article gives you some lovely ideas to try!
Resources
- https://www.wikihow.com/Display-Embroidery-Without-a-Hoop
- https://www.bethcolletti.com/blog/rectangle-embroidery
- https://frugalhomeaddict.com/creative-ways-to-display-embroidery
- https://www.pinterest.com/pin/10-super-adorable-ways-to-display-your-embroidery-hoop-art-catshy-crafts–208995238934673383
- https://www.youtube.com/watch?v=mA45alm_Phg
- https://paraffle.com/blogs/ultimate-embroidery-guide-for-beginners/how-to-display-embroidery-art
- https://www.gatheringthread.com/15-ways-to-display-embroidery/