Quilts are a brilliant way to use leftover materials in a visually striking way that can complement bed linens, decorate an empty-looking couch, or even be used as wall decor! Most furnishings and rooms around your house are made much more aesthetically appealing with the addition of a quilt hanging about.
But for someone just starting out with very little in the ways of tools or practical knowledge, how do you sew together quilt squares by hand?
Well, as the headline of the article suggests, you have come to the right spot to learn! In the contents of this post you will find the tools needed, the methods used, and the tips given to get you well on your way.
By the end of this article, you will be quilting like a grandmother that robbed a fabric store at needlepoint.

Tools Needed
At the risk of the title seeming misleading, unfortunately, you will need more than just your diligent digits to get started.
Thankfully, most of the things you need are incredibly inexpensive and can typically be found around the house or at a reasonable price on the internet or at a local fabric store.
Needle and Thread
Centuries-old and still one of the most important tools for sewing, you will need as thin a needle as you feel you can competently use, and quilting thread. Try to use threads that are similar to or the same color as the fabric you will be using in the quilt. Alternatively, neutral colors will also work well in a pinch.
Considering most quilts are made with cotton, try to find your colors in cotton thread.
Rotary Cutter, Transparent Ruler, and A Cutting Mat
Rotary cutters are very effective tools at cutting through the fabric you will choose and should be used on cutting mats to lessen the chance of damaging the surface underneath or making uneven cuts on the material.
You should also invest in a ruler that is visible or transparent throughout that you can use to measure out clear, straight cuts without obstructing the fabric.
The ideal size for a ruler measures five inches wide and twenty-four inches in length.
Fabric, Thimble, Straight Pins, and Safety Pins
The easiest and most widely-used fabric is cotton and I recommend it not only for the fact that it will be the simplest fabric to start with, but also because it is a very breathable, inexpensive material.
You will also need a few straight and safety pins to help keep your quilt squares together and held in place. Finally, you will need a thimble so you aren’t drawing blood with every pass-through.
You should also use a marking pen, pencil, or something to path out where you will be sewing, though that is entirely up to you.
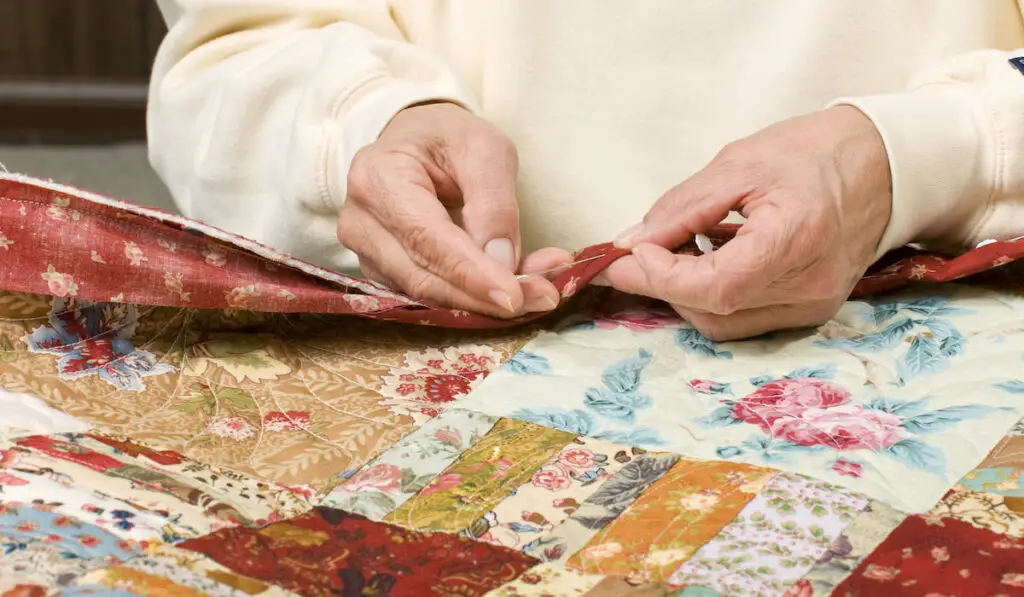
How to Quilt Squares Together by Hand
When quilting squares together, most quilters like to go with two alternating colors that they will use throughout the quilt. Imagine a chessboard but the colors can be whatever you like!
You can begin to make this a bit more abstract and unique by switching out one color with paisley designs, diagonal lines, or whatever you like!


- You will need to leave a small seam allowance on your squares, which can be marked with your pen or pencil. This will only have to be on one side so it shouldn’t show up later on the exposed side of the quilt.
- Place your two squares of the quilt on top of one another until they are perfectly lined up, make sure that the way these are stacked together matches throughout the quilt. (If you are using a red top and orange bottom, do so for every square of this type.) Place a straight pin here to ensure they remain in place, you can secure it more with additional pins if you wish.
- Using a thread length of about half your arm or finger to elbow, thread the eye of the needle until the thread is evenly distributed halfway on either side of the needle. You should be able to hold both ends of the thread in one finger with the needle sitting in the middle of your thread on the opposite hand.
- Tie the two ends of the thread together to create a knot about a quarter-inch of the way up the length of the thread, opposite the needle.
- Depending on what your dominant hand is, start right if right-handed, left if left-handed, and begin the sewing process by piercing the fabrics about a quarter-inch past the edge of the fabric. Remember to go straight through and not at a diagonal or odd angle and to follow the marked line you made earlier to keep the thread line straight.
- Once you have gotten the thread all the way through to the knot, you will now make what is known as a backstitch. On the underside of the fabric where your needle just passed through, go back into the quilt. Piercing from the opposite side your first stitch went into, pierce closer to the edge of the fabric, behind your first stitch. This will help secure the edges of your quilt square, and you will do it at the other edge as well.
- You can now begin stitching along your marked seam allowance line, making sure you go stitch from the front, then create a backstitch slightly in front of it, slowly working across the line. Be careful when doing the backstitch, as it can be tricky trying to get on the line and your stitching can begin to tilt away from your line.
- Once you have gotten towards the opposite edge of your joined squares, be sure to create a few concise backstitches to help seal up the corner well.
- Clip the needle of the excess thread, and with the excess thread sticking out of the material, create a knot (Double it even) that will help keep the thread from unfastening over time. The remaining loose thread above the knot can then be trimmed.
- Now that the squares are sewn together, you can open them up and press your seam allowance to one side. Be diligent when doing this, as you want the squares to lay flat.
Congratulations, you have joined quilt squares together without the use of a sewing machine! You can add to this as much as you want until you have a small cloth all the way up to a quilt that could cover a king-sized bed.
This peaceful pastime is one of the most useful hobbies you could have, and it’s incredibly calming as well!